Skip to search box Skip to main content
Text Only Version

Basic Disaster Supplies Kit

Picture of people building a disaster supply kit

Build a kit for disasters to be prepared.

You may need to survive on your own after an emergency. This means having your own food, water, and other supplies in sufficient quantity to last for at least three days. Local officials and relief workers will be on the scene after a disaster, but they cannot reach everyone immediately. You could get help in hours, or it might take days. In addition, basic services such as electricity, gas, water, sewage treatment, and telephones may be cut off for days, or even a week or longer. 
 

Topics related to building a disaster supply kit:


Visit Prepare for an Emergency web page.

Recommended Items to Include in a Basic Emergency Supply Kit:

  • Water, one gallon of water per person per day for at least three days, for drinking and sanitation
  • Battery-powered or hand crank radio and a NOAA Weather Radio with tone alert and extra batteries for both
  • Flashlight and extra batteries
  • First aid kit
  • Whistle to signal for help
  • Dust mask, to help filter contaminated air and plastic sheeting and duct tape to shelter-in-place
  • Moist towelette, garbage bags and plastic ties for personal sanitation
  • Wrench or pliers to turn off utilities
  • Can opener for food (if kit contains canned food)
  • Local maps
  • Cell phone with chargers, inverter or solar charger


How To Assemble a Disaster Preparedness Kit

 Click here to learn more about the Prepping A Go Bag With Supplies In Case Of An Emergency: It’s Scary Simple | FEMA Video

Click here to view the Prepping A Go Bag With Supplies In Case Of An Emergency: It’s Scary Simple | FEMA video above.

Additional Items to Consider Adding to an Emergency Supply Kit:


Once you have gathered the supplies for a basic emergency kit, you may want to consider adding the following items:


  • Prescription medications and glasses
  • Infant formula and diapers
  • Pet food and extra water for your pet
  • Cash or traveler's checks and change
  • Important family documents such as copies of insurance policies, identification and bank account records in a waterproof, portable container. You can use the Emergency Financial First Aid Kit  developed by Operation Hope, FEMA and Citizen Corps to help you organize your information.
  • Emergency reference material such as a first aid book or information from www.ready.gov.
  • Sleeping bag or warm blanket for each person. Consider additional bedding if you live in a cold-weather climate.
  • Complete change of clothing including a long sleeved shirt, long pants and sturdy shoes. Consider additional clothing if you live in a cold-weather climate.
  • Household chlorine bleach and medicine dropper – When diluted nine parts water to one part bleach, bleach can be used as a disinfectant. Or in an emergency, you can use it to treat water by using 16 drops of regular household liquid bleach per gallon of water. Do not use scented, color safe or bleaches with added cleaners.
  • Fire Extinguisher
  • Matches in a waterproof container
  • Feminine supplies and personal hygiene items
  • Mess kits, paper cups, plates and plastic utensils, paper towels
  • Paper and pencil
  • Books, games, puzzles or other activities for children    


Content Provided by FEMA


Back to Content List


Maintaining Your Kit


Just as important as putting your supplies together is maintaining them so they are safe to use when needed. Here are some tips to keep your supplies ready and in good condition:

Recommended Supplies for your Emergency Supply KitClick here to download a list
of recommended supplies
  • Keep canned food in a cool, dry place.   
  • Store boxed food in tightly closed plastic or metal containers to protect from pests and to extend its shelf life.
  • Throw out any canned good that becomes swollen, dented or corroded.
  • Use foods before they go bad and replace them with fresh supplies
  • Place new items at the back of the storage area and older ones in the front.
  • Change stored food and water supplies every six months. Be sure to write the date you store it on all containers.
  • Re-think your needs every year and update your kit as your family’s needs change.

Keep items in airtight plastic bags and put your entire disaster supplies kit in one or two easy-to-carry containers, such as an unused trashcan, camping backpack or duffel bag.


Back to Content List


Kit Storage Recommended Locations


Since you do not know where you will be when an emergency occurs, prepare supplies for home, work and vehicles.

Home

Picture of storage bin with emergency supplies

Your disaster supplies kit should contain essential food, water and supplies for at least three days.

Keep this kit in a designated place and have it ready in case you have to leave your home quickly. Make sure all family members know where the kit is kept.

Additionally, you may want to consider having supplies for sheltering for up to two weeks.

You need to be prepared to shelter at work for at least 24 hours. Make sure you have food and water and other necessities like medicines in your kit. Also, be sure to have comfortable walking shoes at your workplace in case an evacuation requires walking long distances.

Your kit should also be in one container and ready to “grab and go” in case you are evacuated from your workplace.

Work

You need to be prepared to shelter at work for at least 24 hours. Make sure you have food and water and other necessities like medicines in your kit. Also, be sure to have comfortable walking shoes at your workplace in case an evacuation requires walking long distances.

Your kit should also be in one container and ready to “grab and go” in case you are evacuated from your workplace.

Vehicle

In case you are stranded, keep a kit of emergency supplies in your car. This kit should include:

  • Jumper cables
  • Flashlights and extra batteries
  • First aid kit and necessary medications in case you are away from home for a prolonged time
  • Food items containing protein such as nuts and energy bars; canned fruit and a portable can opener
  • Water for each person and pet in your car
  • AM/FM radio to listen to traffic reports and emergency messages
  • Cat litter or sand for better tire traction
  • Shovel
  • Ice scraper
  • Warm clothes, gloves, hat, sturdy boots, jacket and an extra change of clothes
  • Blankets or sleeping bags

Also consider:

  • A fully-charged cell phone and phone charger
  • Flares or reflective triangle
  • Baby formula and diapers if you have a small child

Be prepared for an emergency by keeping your gas tank full and if you find yourself stranded, be safe and stay in your car, put on your flashers, call for help and wait until it arrives.


Back to Content List


Food


Consider the following things when putting together your emergency food supplies:

  • Store at least a three-day supply of non-perishable food.
  • Choose foods your family will eat.
  • Remember any special dietary needs.
  • Avoid foods that will make you thirsty.
  • Choose salt-free crackers, whole grain cereals and canned foods with high liquid content.

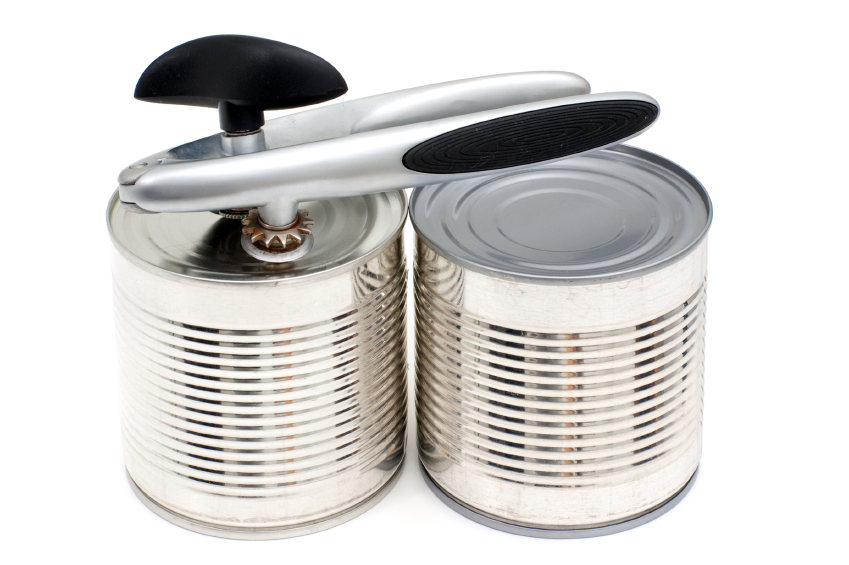
Following a disaster, there may be power outages that could last for several days. Stock canned foods, dry mixes and other staples that do not require refrigeration, cooking, water or special preparation. Be sure to include a manual can opener and eating utensils.

picture of a can opener an essential part of your emergency supply kit

The following items are suggested when selecting emergency food supplies. You may already have many of these on hand.

Choose foods your family will eat.

  • Ready-to-eat canned meats, fruits and vegetables
  • Protein or fruit bars
  • Dry cereal or granola
  • Peanut butter
  • Dried fruit
  • Nuts
  • Crackers
  • Canned juices
  • Non-perishable pasteurized milk
  • High energy foods
  • Vitamins
  • Food for infants
  • Comfort/stress foods

 Maintaining Your Kit

Just as important as putting your supplies together is maintaining them so they are safe to use when needed. Here are some tips to keep your supplies ready and in good condition:

  • Keep canned food in a cool, dry place.
  • Store boxed food in tightly closed plastic or metal containers to protect from pests and to extend its shelf life.
  • Throw out any canned good that becomes swollen, dented or corroded.
  • Use foods before they go bad and replace them with fresh supplies.
  • Place new items at the back of the storage area and older ones in the front.
  • Change stored food and water supplies every six months. Be sure to write the date you store it on all containers.
  • Re-think your needs every year and update your kit as your family’s needs change.

Keep items in airtight plastic bags and put your entire disaster supplies kit in one or two easy-to-carry containers, such as an unused trashcan, camping backpack or duffel bag. .....


Water


Water is an essential element to survival and a necessary item in an emergency supplies kit. Following image of water bottles
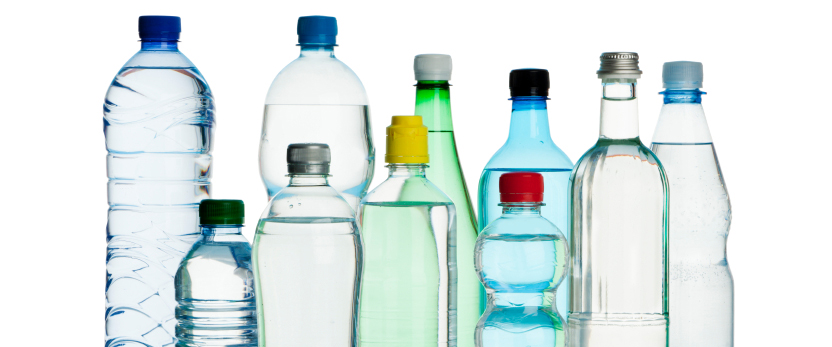
a disaster, clean drinking water may not be available. Your regular water source could be cut-off or compromised through contamination. Prepare yourself by building a supply of water that will meet your family’s needs during an emergency.

How Much Water Do I Need?

You should store at least one gallon of water per person per day. A normally active person needs at least one gallon of water daily just for drinking however individual needs vary, depending on age, physical condition, activity, diet and climate.

To determine your water needs, take the following into account:

  • One gallon of water per person per day, for drinking and sanitation.
  • Children, nursing mothers and sick people may need more water.
  • A medical emergency might require additional water.
  • If you live in a warm weather climate more water may be necessary. In very hot temperatures, water needs can double.
  • Keep at least a three-day supply of water per person.
How Should I Store Water?

It is recommended you purchase commercially bottled water, in order to prepare the safest and most reliable emergency water supply. Keep bottled water in its original container and do not open until you need to use it. Observe the expiration or “use by” date. Store in cool, dark place.

Preparing Your Own Containers of Water

It is recommended you purchase food grade water storage containers from surplus or camping supplies stores to use for water storage.

Before filling with water, thoroughly clean the containers with dishwashing soap and water and rinse completely so there is no residual soap.

If you chose to use your own storage containers, choose two-liter plastic soft drink bottles – not plastic jugs or cardboard containers that have had milk or fruit juice in them. Milk protein and fruit sugars cannot be adequately removed from these containers and provide an environment for bacterial growth when water is stored in them. Cardboard containers also leak easily and are not designed for long-term storage of liquids. Also, do not use glass containers, because the can break and are heavy.

Storing Water in Plastic Soda Bottles

Follow these steps for storing water in plastic soda bottles.

Thoroughly clean the bottles with dishwashing soap and water, and rinse completely so there is no residual soap.

Sanitize the bottles by adding a solution of 1 teaspoon of non-scented liquid household chlorine bleach to a quart of water. Mix the sanitizing solution in the bottle so that it touches all surfaces. After sanitizing the bottle, thoroughly rinse out the sanitizing solution with clean water.

Fill the bottle to the top with regular tap water. If the tap water has been commercially treated from a water utility with chlorine, you do not need to add anything else to the water to keep it clean. If the water you are using comes from a well or water source that is not treated with chlorine, add two drops of non-scented liquid household chlorine bleach to the water. Let the water stand for 30 minutes before using.

A slight chlorine odor should be noticeable in the water, if not, add another dose of bleach and allow the water to stand another 15 minutes.

Tightly close the container using the original cap. Be careful not to contaminate the cap by touching the inside of it with your finger. Place a date on the outside of the container so you can know when you filled it. Store in cool, dark place.

Water can also be treated with water purification tablets that can be purchased at most sporting goods stores.

Water that has not been commercially bottled should be replaced every six months.

More information on water treatment is available at RedCross.org.


Back to Content List


First Aid Kit


In any emergency a family member or you yourself may be cut, burned or suffer other injuries. If you have these basic supplies you are better prepared to help your loved ones when they are hurt. Remember, many injuries are not life threatening and do not require immediate medical attention. Knowing how to treat minor injuries can make a difference in an emergency. Consider taking a first aid class, but simply having the following things can help you stop bleeding, prevent infection and assist in decontamination.

Things you should have:

  • Two pairs of Latex, or other sterile gloves (if you are allergic to Latex).
  • Sterile dressings to stop bleeding.
  • Cleansing agent/soap and antibiotic towelettes to disinfect.
  • Antibiotic ointment to prevent infection.
  • Burn ointment to prevent infection.
  • Adhesive bandages in a variety of sizes.
  • Eye wash solution to flush the eyes or as general decontaminant.
  • Thermometer (Read more: Biological Threat)
  • Prescription medications you take every day such as insulin, heart medicine and asthma inhalers. You should periodically rotate medicines to account for expiration dates.
  • Prescribed medical supplies such as glucose and blood pressure monitoring equipment and supplies.
Things That may be good to have In Your Kit:
  • Cell phone with charger
  • Scissors
  • Tweezers
  • Tube of petroleum jelly or other lubricant
Non-prescription drugs:
  • Aspirin or nonaspirin pain reliever
  • Anti-diarrhea medication
  • Antacid (for upset stomach)
  • Laxative


Back to Content List


Unique Family Needs


Remember the unique needs of your family members when making your emergency supply kit and family emergency plan.

For Baby:

  • Formula
  • Diapers
  • Bottles
  • Powdered milk
  • Medications
  • Moist towelettes
  • Diaper rash ointment

 Emergency Preparedness Information for parents and caregivers of infants and children from the NYS Dept of Health.

For Adults:

  • Ask your doctor about storing prescription medications such as heart and high blood pressure medication, insulin and other prescription drugs.
  • Denture needs
  • Contact lenses and supplies
  • Extra eye glasses

Ask your doctor about storing prescription medications such as heart and high blood pressure medication, insulin and other prescription drugs.

If you live in a cold climate, you must think about warmth. It is possible that you will not have heat. Think about your clothing and bedding supplies. Be sure to include one complete change of clothing and shoes per person, including:

  • Jacket or coat
  • Long pants
  • Long sleeve shirt

Back to Content List


Clean Air


Some potential emergencies could send tiny microscopic "junk" into the air. For example flooding could create airborne mold which could make you sick and an explosion may release very fine debris that can cause lung damage. A biological terrorist attack may release germs that can make you sick if inhaled or absorbed through open cuts. Many of these agents can only hurt you if they get into your body, so think about creating a barrier between yourself and any contamination.

Nose and Mouth Protection

Face masks or dense-weave cotton material, that snugly covers your nose and mouth and is specifically fit for each member of the family. Do whatever you can to make the best fit possible for children.

Be prepared to improvise with what you have on hand to protect your nose, mouth, eyes and cuts in your skin. Anything that fits snugly over your nose and mouth, including any dense-weave cotton material, can help filter contaminants in an emergency. It is very important that most of the air you breathe comes through the mask or cloth, not around it.

Do whatever you can to make the best fit possible for children. There are also a variety of face masks readily available in hardware stores that are rated based on how small a particle they can filter in an industrial setting.

Given the different types of emergencies that could occur, there is not one solution for creating a barrier between yourself and any contamination in the air. Simple cloth face masks can filter some of the airborne particulates or germs you could inhale, but will probably not protect you from chemical gases. Still, something over your nose and mouth in an emergency is better than nothing. Limiting how much foreign matter is inhaled may impact whether or not you get sick or develop disease.

Other Barriers

  • Heavyweight plastic garbage bags or plastic sheeting
  • Duct tape
  • Scissors

There are circumstances when staying put and creating a barrier between yourself and potentially contaminated air outside, a process known as "shelter-in-place," is a matter of survival. You can use these things to tape up windows, doors and air vents if you need to seal off a room from outside contamination. Consider precutting and labeling these materials. Anything you can do in advance will save time when it counts.

Use available information to assess the situation. If you see large amounts of debris in the air, or if local authorities say the air is badly contaminated, you can use these things to tape up windows, doors and air vents if you need to seal off a room.

HEPA (High Efficiency Particulate Air Filtration) Filter Fans

Once you have sealed a room with plastic sheeting and duct tape you may have created a better barrier between you and any contaminants that may be outside. However, no seal is perfect and some leakage is likely. In addition to which, you may find yourself in a space that is already contaminated to some degree.

Consider a portable air purifier, with a HEPA filter, to help remove contaminants from the room where you are sheltering. These highly efficient filters have small sieves that can capture very tiny particles, including some biological agents. Once trapped within a HEPA filter contaminants cannot get into your body and make you sick. While these filters are excellent at filtering dander, dust, molds, smoke, biological agents and other contaminants, they will not stop chemical gases.

Some people, particularly those with severe allergies and asthma, use HEPA filters in masks, portable air purifiers as well as in larger home or industrial models to continuously filter the air.


Back to Content List


Suffolk County Government

H. Lee Dennison Bldg

100 Veterans Memorial Hwy
P.O. Box 6100
Hauppauge, NY 11788

Riverhead County Center

County Road 51
Riverhead, NY 11901